Chocolate Thumbprint Cookies with Brown Sugar Frosting
Use this search box to find the info you're looking for!

Make a batch of thumbprint cookies. Fill them with your favorite flavor.

Rich brown sugar frosting, semisweet chips, vanilla frosting, maraschino cherries, or cheesecake filling. All good choices.
Can't decide? Try them all.
Or devise your own.
Like some white chocolate chips, peanut butter chips, a pecan half or some other nut.
Maybe a combination or whatever you desire.
Dress these cocoa-rich cookies for your next party.
Thumbprint Cookies Recipe
4 oz (113g) of butter, softened
3/4 cup (144g) of granulated sugar
1/2 cup (56g) of natural cocoa, or 3/4 cup (83g) cocoa for very dark cookies
2 egg yolks
2 tablespoons (30ml) of milk
1 teaspoon (4g) of vanilla extract
1/4 teaspoon (1g) of salt
1 cup (99g) of all-purpose flour
Warm oven to 350°F (180°C/gas 4).
Beat the butter and sugar together till creamy. On low speed, slowly add the cocoa powder.
Next, add the egg yolks, milk, vanilla and salt.
Mix in the flour. Turn off the mixer, with a plastic spatula scrape the sides of the bowl. Then continue mixing until well blended.
Use a cookie scoop or roll the dough into 1 1/2-inch (3.8cm) balls. Or a 1-inch (2.5cm) ball for a smaller cookie.
For a more decorative cookie roll the ball in powdered sugar.
Lightly spray cookie sheet with a non-stick spray like Pam.
Place the ball on the pan.

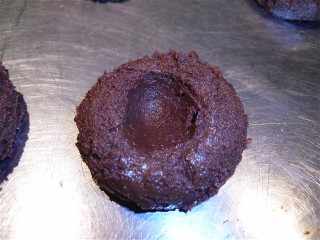
Then using your thumb, gently press down on the dough, making a depression in the middle.
It's kinda fun to smash that dough, isn't it?
Now you can put cheesecake filling, chocolate chips or a little of both in your thumbprint.
Or you can wait till they're baked and use one of the other fillings.
Bake about 10 minutes.
While the chocolate cookies are baking prepare the brown sugar frosting or icing of your choice.
Those need to be put on the cookie while they're still warm.
Cool slightly. Then remove from the pan. Put on your frosting. (Pop in your mouth!)
Makes about 18 cookies, using the scoop.
Brown Sugar Frosting
2 1/2 tablespoons (36g) of butter* or margarine
1/2 cup (101g) of brown sugar
1/2 teaspoon (4g) of vanilla extract
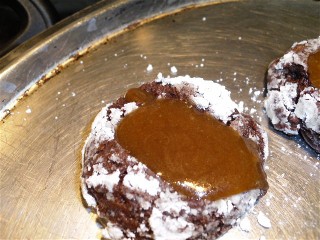
In a small microwave-safe bowl melt the butter. Stir in the brown sugar and vanilla extract till well mixed.
That's it. It's ready to go on those warm thumbprint cookies.
Place about a 1/4 teaspoon of frosting in each print.
*Save a little fat by substituting 2 teaspoons (10ml) of low-fat milk for 1 tablespoon (14g) of the butter.
Vanilla icing-melt 1 tablespoon (14g) of butter or margarine. Add 1/2 cup (65g) of powdered/confectioner's sugar, 2 teaspoons (10ml) of milk and 1/4 teaspoon (1g) of vanilla. Mix well.
Or try the cheesecake filling recipe.
Decorating Cookies
Here are a few suggestions for decorating your cookies for a special occasion. I'm sure you can think of more.
Christmas-place a half of a maraschino cherry on top of the frosting. Use both red and green maraschino cherries.

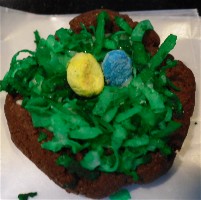
Easter-put some coconut dyed with green food coloring in the print. Place a jelly bean on top of the “nest”. Or some other small egg-shaped candy.
Put vanilla frosting in the print. Carefully press the coconut and candy into the icing. The icing will glue them to the cookie.

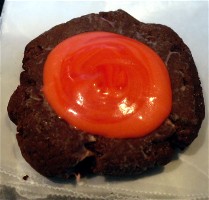
Halloween-dye the vanilla icing orange or blood red. Or put a gummy eyeball, ear wax or something disgusting in the center of the cookie!
Or just decorate the frosting with holiday appropriate colored sprinkles.
Valentine's Day-fill the print with red or pink frosting for the one you love!
Thumbprint cookies are a fun to make. But they're even more fun to eat!
Rich brown sugar frosting makes them extra delicious.
Return to Chocolate Cookie Recipe Page
Return to Health Benefits of Dark Chocolate Home Page
New! Comments
Feeling the need to send some feedback? Leave me a comment in the box below.